Friday, November 27, 2009

Caramel Mud Cake with Caramel Icing

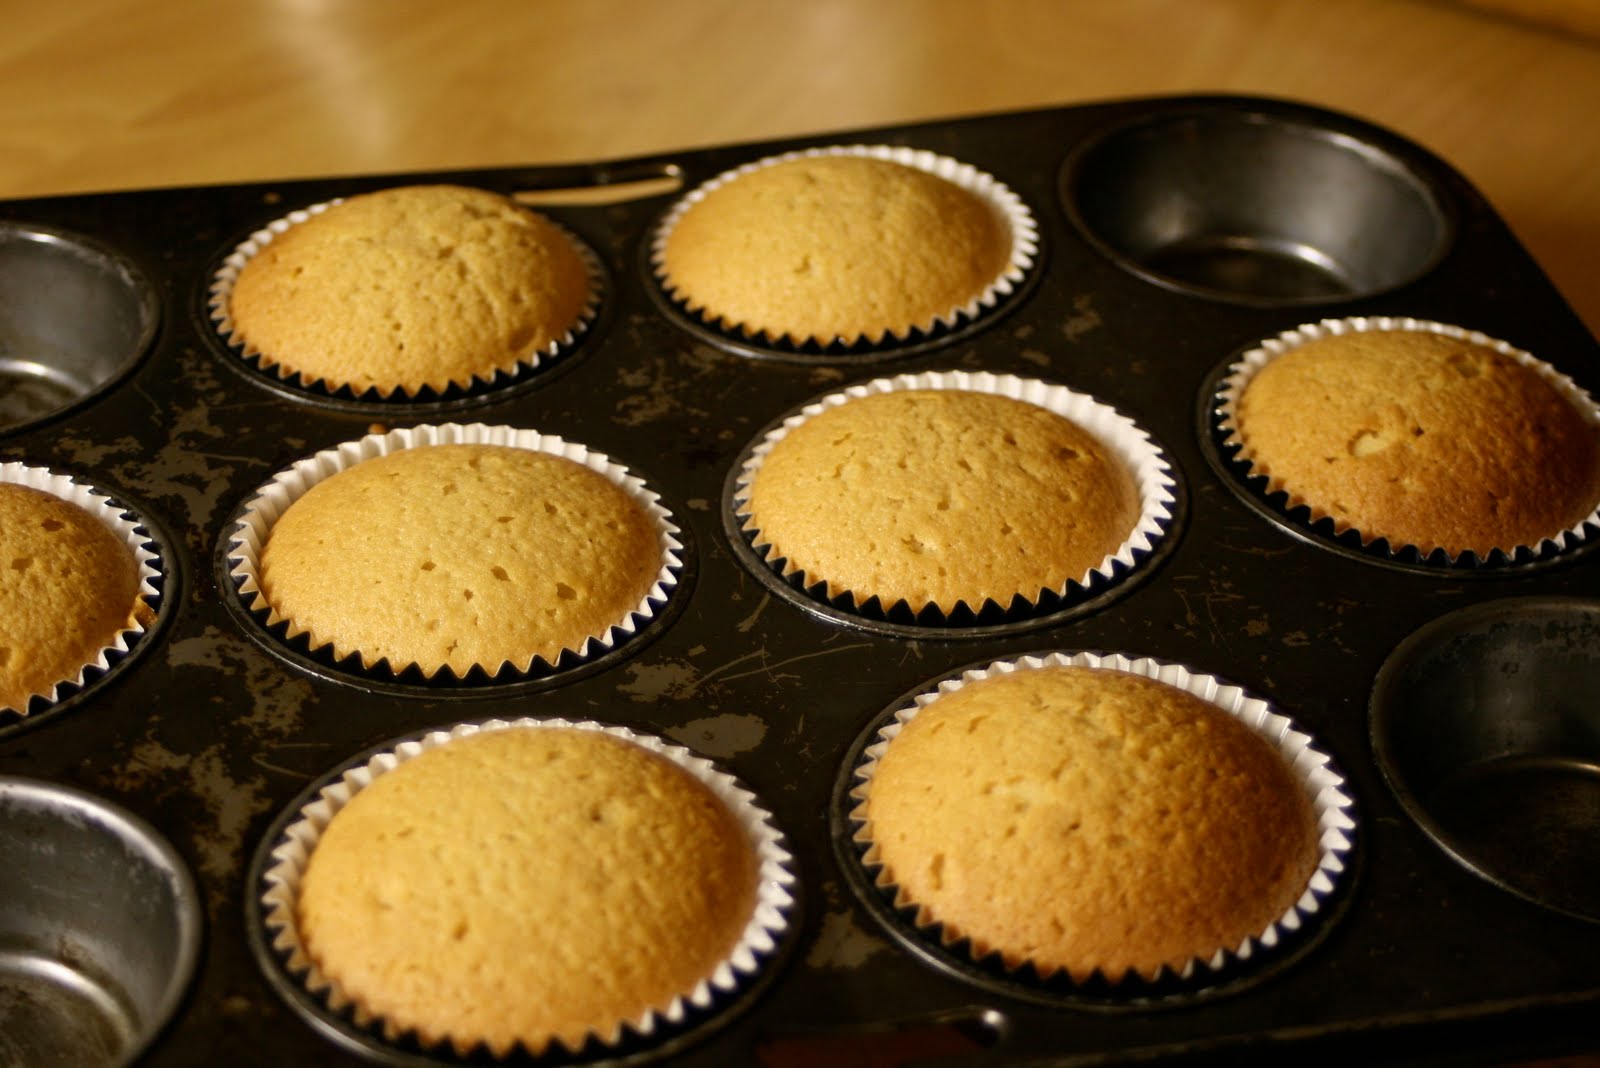
It was my friend Yvonne's birthday last week. She and I both have 3 boys of the same age, who all started pre-school together and have been going to play group together too. So what do you get a super mum for her birthday....well, I never know...so I bake. I baked a heart shaped caramel mud cake with caramel icing and decorated with piped white chocolate flowers. I had some mixture left over so I also made some mud cup cakes too! It was so easy, you just need to allow for a bit of time for the slow baking and the cooling down of the cake before icing. Enjoy!

Caramel mud cake

Melted butter, to grease
200g butter, cubed
200g white chocolate, chopped
200g (1 cup, firmly packed) dark brown sugar
180ml (3/4 cup) hot water
1 tbs golden syrup
2 tsp vanilla essence
2 eggs, at room temperature
150g (1 cup) plain flour
150g (1 cup) self-raising flour (or plain flour with 2 tsp baking powder)
Icing sugar, to dust (optional or see caramel icing recipe below)

Preheat oven to 160°C/325°F. Brush a round 22cm (base measurement) cake pan with melted butter. Line base and side with non-stick baking paper. Place butter, chocolate, sugar, water, golden syrup and vanilla essence in a heavy-based saucepan. Another option is to do this part in the microwave see note below.


Stir over medium-low heat with a wooden spoon for 5 mins or until chocolate melts and mixture is smooth.


Set aside for 20 mins to cool.


Add eggs, 1 at a time, beating well after each addition. Sift combined flours over chocolate mixture and stir with a wooden spoon until well combined. Pour mixture into greased and lined pan and bake in preheated oven for 50-60 mins or until a skewer comes out almost clean. Stand cake for 20 mins before turning onto a wire rack to cool. Dust with icing sugar or mix up some caramel icing.


Caramel Mud Cake Icing


½ cup brown sugar
2 tablespoons thickened cream
60 g butter, chopped
1½ cups icing sugar
¼ cup white chocolate buttons

Place brown sugar, cream, butter and chocolate buttons in a saucepan and heat until butter and chocolate have melted. Remove from heat and gradually stir in the sifted icing sugar to a spreadable consistency. Spread icing quickly over the cooled caramel mud cake. Melt a few white chocolate buttons and pipe some decoration onto the cake for a finishing touch.


Note: Microwave tip: Place butter, chocolate, sugar, water, golden syrup and vanilla essence in a heatproof microwave-safe bowl. Heat, uncovered, on High stirring with a wooden spoon, for 3-4 mins until chocolate melts. Remember to adjust the cooking time to less if you are using a smaller tin + muffin tin.


Sunday, November 22, 2009

Jelly oranges

Kids love jelly and these bite sized jelly boats, not a drop is wasted. These are such a fun party treat for the kids. A friend, another girl who has three son's, made jelly oranges for their birthday parties every year. I finally cracked on to what a great idea they are and have started doing it for my own boys birthdays. The trick is to get thick skinned navel oranges, hopefully with a small navel so the jelly liquid doesn't leak out before it sets. Thick skinned because you don't want to rip or cut the skin while trying to de-orange the orange peel. You'll see what I mean.


Jelly oranges

4-5 oranges
2 packets of jelly crystals
boiling water and cold water for mixing with the jelly crystals

Cut oranges in half from where the stalk was down to the navel, otherwise the jelly mix will leak out of the navel. Then, with a small sharp knife, edge around the orange and the peel to help lift the orange segments out. Don't poke the knife in too far or you'll make a hole in the peel and the jelly will leak out of it. I lost a few orange halves that way. Use your fingers to pry the orange away from the peel.


Scrape any excess orange off the peel as the juice may affect the setting of the jelly. Rinse and pat dry. Set the orange shells on a tray making sure all are even, tuck a little paper towel under to ensure no wobbles. Save the oranges segments for afternoon tea.


Mix up your packets of jelly as per the instructions on the box. Pour cooled jelly into the orange halves and set in the fridge. Allow a few hours.


When ready to serve slice the oranges into segments and serve.


It would be fun to pull these out at half time at a soccer game, give the kids a bit of a surprise and a boost.

Monday, November 9, 2009

Roasted garlic pumpkin


I just love pumpkin, particularly the Jap pumpkin (or the Kent variety) it's rich yellow, orange colour, and the flavour is so sweet. If you want something extra to liven up your salads or just as a side dish this is the most delicious intense flavour. As it bakes in the oven the outside of the pumpkin becomes crispy but inside it is sweet and as smooth as silk.

Roasted garlic pumpkin

1/4 Jap pumpkin (or Kentish)
1-2 cloves garlic
extra virgin olive oil
sea salt

Chop up chunks of pumpkin 2 cm diameter with or without the skin. I chopped off the skin. Coat in olive oil and sprinkle with sea salt and 1 crushed garlic clove. I used one big fat clove. Toss together and then spread over flat baking tray lined with baking paper.


Cook in hot oven 210° C/420° F approx 30 mins or until pumpkin darkens, crisps and reduces in size and caramalises, but is not burnt.


It is so sweet and delicious. Eat on it’s own, throw over a green salad, top a pizza with it or just as a side dish.

Friday, October 30, 2009

Pavlova

This is the first time I have made a pavlova. My mum has always been the pavlova chef so I have never needed to make one. It was a hot Spring day that felt like summer was here, and I had a hankering for a pavlova, thanks Womens Weekly for providing the instructions. I never knew it was so easy. I have made meringue before, see the Crispy Chocolate Meringues recipe, but never a full pavlova. Just make sure your beat the sugar until it dissolves, rub the mixture between your fingers to test otherwise during and after baking it sweats droplets. It is such a delicious, sweet and crunchy summer desert, enjoy.


Pavlova

2 teaspoons butter softened
2 teaspoons cornflour
5 egg whites at room temperature
1 1/4 cups caster sugar
1 tablespoon cornflour, extra
375ml thickened cream, whipped (see note below)
250g strawberries quartered
1 mango diced or sliced into small pieces
1/3 cup passionfruit pulp (optional)

Preheat the oven to 150°C/300°F (130°C/250°F fan forced). Grease a lined cookie tray with softened butter, then sift the cornflour over the greased area.

When separating the eggs, do not get any yolks into the whites as they won't whip as well. Beat the egg whites in a large bowl with an electric mixer until soft peaks form. Gradually add the sugar, beating until dissolved between additions, scraping down the sides of the bowl. Use a large metal spoon or spatula to fold in extra sifted cornflour.


Pile the meringue into the centre of the prepared tray.


Use the back of a metal spoon to spread the meringue into a 23cm circle, making a shallow well in the centre, a bit like a birds nest a little higher at the sides to hold in your cream and fruit topping.


Reduce the oven temperature to 100°C/200°F (80°C/180°F fan-forced). Bake pavlova in the lower half of the oven for 1 1/2 hours or until dry and crisp. Turn off the oven, cool in oven with door ajar. Serve pavlova topped with whipped cream, strawberries and mango (passionfruit opptional).

Note: When whipping cream add 1/2 teaspoon of vanilla and 2 tablespoons of icing sugar, it gives the cream a fuller flavour.


Thursday, September 3, 2009

White Chocolate Blueberry Blondies

Blondies, I found out after much pondering, are the opposite of brownies. So if you've had enough of chocolate brownies, but still need a chocolate sweet fix then you must try these. I have been experimenting with these blondies to include hazelnuts into the recipe. I first baked them with whole hazelnuts and just white chocolate, it was delicious but I felt the nuts were too big. My next experiment was to use a whole block of hazelnut milk chocolate, as the nuts were already roasted and crushed to perfection, surrounded by milk chocolate which made it even better. So here is the recipe from my latest experiment which I think is rather yummy. You can substitute raspberries for the blueberries and just use white chocolate, and for a little added extra add a handful of roasted chopped macadamias.


White Chocolate Blueberry Blondies

125g butter, chopped
180g white eating chocolate, chopped
180g block of hazelnut chocolate, chopped
3/4 cup (165g) sugar
2 eggs beaten lightly
1 1/4 cup (110g) plain flour
1 teasp baking powder
150g fresh or frozen blueberries

Combine butter and two-thirds of the white chocolate in a medium saucepan, stir over a low heat until smooth. Cool 10 mins.

Preheat oven to 180°C/360°F. Grease a 23cm square slab cake pan, line the base and sides with baking paper.

Stir sugar and eggs into butter mixture then sifted flours, remaining chocolate and then the blue berries. Gently mix, you don't want the blueberries getting too squashed up. Spread the mixture into the prepared pan.


Bake for about 40 mins. Cool in the pan.


When cooled, slice up and dust with icing sugar.


Saturday, August 22, 2009

Jam Drop Cookies

My computer is in the computer hospital at the moment with all of my cooking photo's on it, so I'm resorting to a recipe I frequently bake, and have posted on my family blog previously. This recipe is so smooth and delicious and the family just love them. This one comes from a cook book that Donald and I got as a wedding present. It has been one of the most useful recipe books I own. Thanks to Kim, Donald's cousin we are the proud owners of one "Mrs Fields Cookie Book" and we just loooove it.


So the recipe I'm going to share today is based on Mrs Fields Suprise-Filled Cookies, but I've added a little custard powder to make them taste smoother. Bascially they're jam drop cookies.


Jam Drop Cookies

2 1/4 cups plain flour
1/4 cup custard powder
1/2 tsp baking powder
1 cup salted butter, softened
1 cup white sugar
1 large egg
2 tsp. pure vanilla extract
your favourite jam for the filling

Preheat oven to 150° C/300° F
In a medium bowl combine flour, custard powder and baking powder. Mix well with a wire whisk and set aside. In a medium bowl cream butter and sugar. Add egg and vanilla and beat until smooth. Add the flour mixture and blend at low speed until combined. The dough will be firm.

Scoop teaspoonfuls of dough, roll into balls about 2 cm diameter and place on ungreased baking sheets or baking paper about 2 1/2 cm's apart, they will spread as they cook. Use your thumb to depress the middle of the cookie ball and make a little well, but not too hard that you make a hole in the bottom. Using a teaspoon drop a little of your jam to fill the well, not too much as it will spill over while it cooks.


Bake for 22-24 minutes until very lightly golden yellow. Remember the jam will be stinking hot when they come out so wait till they cool a little before munching into them.


Thursday, July 30, 2009

Black Forest Gateau

Alright, if you're prepared for deliciousness, richness, chocolatey, moist and creamy and did I mention rich, then this is the cake for you.  It was perfect, just how I wanted it to be.  This was my husbands birthday cake, I don't think he was prepared for how rich and chocolatey his birthday cake was to be...I was!  I've made basic black forest cakes before with just an ordinary chocolate cake base, but this time I followed the books recipe, except for the kirsch liquor, which we don't use and didn't need.  The recipe comes from my Chocolate Dreams recipe book by Christine France, I inherited it from my sister.... thank you Gabby.  


Black Forest Gateau

6 eggs
1 cup caster sugar
1 tsp vanilla essence
1/2 cup plain flour
1/2 cup cocoa powder
1/2 cup melted butter

Filling

60ml Kirsch (optional I didn't use it)
600ml/2 1/2 cups double cream or thickened cream
2 tblspn icing sugar
1/2 teasp vanilla essence
675g jar/can pitted black cherries well drained
Juice from the jar of cherries.

To Decorate

2 Cadbury Flake bars crumbled or grated chocolate
Fresh or drained cherries

Preheat oven to 180°C/350°F.  Grease three 19cm round cake tins.  

**I used two 21cm round tins and made double the mixture to bake 4 cakes.  It depends on the size of your pans and how big you want your cake.  I'm making a 3 layer cake and I have frozen the 4th cake.**  

Line the bottom and sides of each tin with non-stick baking paper.  Combine the eggs with the sugar and vanilla essence in a bowl and beat with a hand-held electric mixer until pale and very thick.

Sift the flour and cocoa powder over the mixture and fold in lightly and evenly with a metal spoon.  Gently stir in the melted butter.


Divide the mixture among the prepared tins, smoothing them level.  I only cooked two at a time.
  

Bake for 15-18 mins, until the cakes have risen and are springy to the touch  leave them to cool in the tins for about 5 mins, then turn out on to wire racks and leave to cool completely.  Remove the lining from each cake.


Prick each layer of cake all over with a skewer then sprinkle with a couple of table spoons of cherry juice (or the Kirsch).


Using a hand held electric mixer, whip the cream in a bowl until it starts to thicken, then gradually beat in the icing sugar and vanilla essence until the mixture begins to hold its shape.

To assemble, spread one cake layer with a thick layer of cream and top with about half of the cherries.


Put second cake layer over the top of the first, spread with cream, top with cherries.  You could leave the cake like this and it would still be wonderful.  But I'm going for 3 layers of decadence.
  

Top with the final cake layer.


Spread the remaining cream all over the cake top and sides.
  

Sprinkle with chocolate and decorate with cherries. I used a piping bag for the cream blobs that the cherries sit on.
 
 
Cherries with stalks or without? 


 I think I prefer the stalks left on they look like little birthday candles.

Friday, July 24, 2009

Homemade Sausage rolls

I have been making these sausage rolls for birthday parties over the past few years. I am tired of greasy sausage rolls from the frozen food section and wanted to make a healthier, tastier version for the kids (and adults). It is easy and you get to choose the type of filling for your sausage rolls.  So go get yourself some lovely gourmet sausages the flavour of your choice.  I chose lamb, rosemary, mint and garlic for these ones.


Sausage Rolls

6 gourmet sausages, your choice of flavour
2 sheets ready rolled puff pastry
1 egg beaten
1 table spoon sesame seeds

Turn on your oven to 200°C/400°F. Line baking trays with baking paper. Defrost 2 sheets of puff pastry about an hour before you start cooking. It will give the pastry time to thaw so it's easy to work it.

You need about 3 gourmet sausages per square sheet of puff pastry.  Peel the skin off your sausages just like for the spaghetti and meatballs.  Cut the pastry in half.  Lay the sausage down the long edge of the puff pastry and add another 1/2 sausage until the lenth of the pastry is covered and comes to the end of the pastry.  You can always stretch the sausage to fit.  Brush beaten egg on the opposite edge of the pastry to the sausage.  Now roll the pastry until the sausage is covered.  The egg will seal the pastry and sausage roll together.


Cut the large roll into whatever sized sausage rolls you like, I like bite size, and place them onto a lined baking tray.  Repeat with the rest of the pastry and sausages. 
 

Brush beaten egg on top of sausage rolls and sprinkle with sesame seeds.


Place in a hot oven for 20-25 mins until golden brown and sausage is cooked.


Serve with tomato sauce (compulsory).


Wednesday, July 15, 2009

Chocolate Marshmallow Cloud Cookies

It's school holidays and with the boys home from school I have lots more time for cooking. It's just a matter of deciding what treat to cook. Today we baked chocolate marshmallow cloud cookies, which comes from my Mrs Fields cookie book. With my little marshmallow goblin helpers (goblin cause that's what they do when they help, gobble, gobble, gobble) we sifted flour and cocoa and added the marshmallows to the mix.


Chocolate Marshmallow Cloud Cookies

3 cups plain flour
2/3 cup cocoa powder
1/2 tsp baking powder
1 cup white sugar
1 cup light brown sugar, firmly packed
1 cup salted butter softened
2 large eggs
2 tsp pure vanilla extract
2 cups dark choc bits
1 100g bag mini marshmallows, frozen


Preheat oven to 200°C/400°F. Put the marshmallows in the freezer prior to baking and keep them there, they need to be kept cold before they go into the cookies.

In a medium bowl combine flour, cocoa and baking powder. Set aside.


Combine sugars in a large bowl. Using an electric mixer, blend in butter, scraping down the sides of the bowl. Add eggs and vanilla, and beat at medium speeed until lght and fluffy.

Add the flour mixture and chocolate chips, and blend at low speed until combined. Batter will be very stiff.

Gather a ball of mixture in the palm of your hand, make a well in the middle and fill with 4-5 frozen marshmallows, cover over completely encasing them and forming a 2-inch-diameter dough ball. Make sure the marshmallows are covered otherwise they will spill out while cooking and become too chewy rather than soft and marshmallowy.  I have tried making smaller cookies with less marshmallows and have tried making them bigger, it just depends if you can handle the sweetness, they are very rich.  I prefer the smaller cookies.


Place balls on lined baking sheets, 2 inches apart. Bake 8-10 minutes. Cool on pan 2 minutes then transfer to a cool flat surface or pop into your mouth.